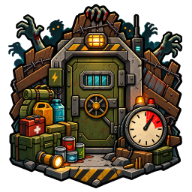
Survival Log One Day to Prepare: Your Essential Pre-Apocalypse Guide
Master the Survival Log one day to prepare mechanic with our expert guide covering stockpile priorities, Planning Points, and safehouse defense.
Why Your First Day Determines Everything in Survival Log
You wake up with a memory of a future that hasn't happened yet. The zombie apocalypse is coming, and you have roughly ten hours to get ready. This is the core hook of Survival Log, the new hoarding survival sim from Midnight Workshop and Lilith Games, available now on Steam. The "Survival Log one day to prepare" mechanic isn't just a tutorial—it's the entire foundation of your run. What you do in those precious pre-disaster hours dictates whether you thrive for ten days or become zombie chow by night three.
The game fuses two distinct phases: a frantic pre-apocalypse shopping spree and a tense post-outbreak stronghold management sim. In the demo, which many players have already experienced, you start as a "Wage Slave" with just $70 and a backpack. According to player experience from early demo runs, most first attempts end in disaster because players waste time on low-priority purchases or fail to understand how the clock works. This guide breaks down exactly how to use your one day of preparation effectively, based on official game information and community reports from the early access period.
Understanding the Time Loop and Planning Points
Before you spend a single dollar, you need to understand the two systems that govern your preparation phase: the countdown timer and Planning Points. The game explicitly warns you that "going and returning will consume countdown time" and that you should "pay attention to the travel time for each location before departing." Every trip to the supermarket, hardware store, or farmers market eats into your limited pre-disaster window.
Planning Points are the real currency of your day. The Survival Log community wiki describes them as the "real tutorial" because every meaningful action spends attention. You start with a limited pool, and once they're gone, you can't initiate new tasks. This forces you to prioritize ruthlessly.
| Action Type | Planning Point Cost | Real-World Value |
|---|---|---|
| Shopping Trip | High | Essential for stockpile |
| Home Organization | Medium | Improves efficiency |
| Skill Research | Medium | Unlocks crafting recipes |
| Sleep/Nap | Low | Restores stamina |
| Exploration (Post-Disaster) | High | Risk vs. reward |
The key insight from successful demo runs is to cap your first-day goals at three items: calories, water, and either boards or fuel. Trying to do everything—buying furniture, stocking a full pantry, reinforcing every window, and researching every skill—will leave you exhausted with an empty house when the sirens start.
Your Pre-Disaster Shopping Priority List
When you hit the streets with your limited cash, you need a clear shopping order. The game features several distinct locations, each with unique inventory. Based on the official Steam page and player experience from the demo, here's the optimal route:
- Discount Supermarket – Start here for calorie-dense, long-shelf-life foods. Look for rice, pasta, canned goods, and vitamin tablets. The starter ingredients kit (potatoes, corn, mushrooms, black pepper) is a solid value.
- Farmers Market – Purchase seeds, basic fertilizer, and a balcony planting starter set. These enable post-disaster food production.
- Convenience Store – Grab batteries, emergency lights, and bottled water. These are cheap and essential.
- Furniture & Equipment Store – Invest in a storage rack, an upgraded door, and possibly a household UPS for power backup.
- Hardware Store – Buy door and window repair kits, small tools, and raw materials like scrap metal and broken glass.
| Location | Must-Buy Items | Skip Items |
|---|---|---|
| Supermarket | Rice, canned goods, vitamins | Fresh produce (spoils fast) |
| Farmers Market | Seeds, fertilizer, compost bin | Expensive tools |
| Convenience Store | Batteries, water, emergency lights | Snack foods (low nutrition) |
| Hardware Store | Repair kits, scrap materials | Generators (too expensive early) |
One critical mistake highlighted in community reports is buying furniture before securing basic survival needs. A nice couch won't save you from starvation. The official game description emphasizes that "every resource you invest before the apocalypse becomes the lifeline that keeps you alive after."
Building Your Safehouse Fortress
Once the disaster hits, you're confined to your home for the first several days. The game's official description notes that you must "transform your home into an apocalypse-proof fortress." This means more than just boarding windows—it's about creating a functional living space.
Your starting home has multiple floors, but the stairs are initially broken and require three separate repairs. The basement is locked and needs a key. Prioritize these upgrades in order:
- Repair the front door – Zombies will attack it constantly. An upgraded door is worth every penny.
- Fix the stairs – Unlocks valuable second-floor space for storage and farming.
- Install storage racks – Organization is crucial. A cluttered house wastes time and Planning Points.
- Set up a workbench – Essential for crafting repair kits, traps, and the rescue beacon.
The power grid will fail repeatedly. Player experience shows that investing in a manual generator backup saves countless headaches. The wiki's getting started guide explicitly states that "a silent manual backup has saved more demo runs than a decorative lamp collection."
Farming and Food Production
Self-sufficiency is the name of the game after day three. The official description promises you can "grow your own crops and cook proper meals because surviving the apocalypse doesn't mean giving up the good life." Your balcony or window-adjacent spaces can host planters, but light conditions matter.
| Crop | Grow Time | Light Requirement | Best Use |
|---|---|---|---|
| Potatoes | 2-3 days | Medium | Staple food |
| Mushrooms | 1-2 days | Low | Quick calories |
| Corn | 3-4 days | High | Versatile ingredient |
A compost bin turns spoiled food into fertilizer, creating a sustainable cycle. One player noted, "I did not realize our food was all bad. But guess what? That's fine. We can turn it into compost." This is the kind of system mastery that separates survivors from casualties.
Defense, Exploration, and Rescue Missions
Around day four or five, the game introduces organized zombie attacks. The official description warns you must "hold the line against endless hordes of zombies" by fortifying, setting traps, and defending your last refuge. Your door will take constant damage, so always keep a repair kit in inventory.
Once you craft a noise maker (scrap metal + broken glass), you can distract zombies and explore the neighborhood. The demo shows that nighttime exploration is incredibly risky—one player was discovered, fled, and sustained injuries that required bandages. The game's own tutorial text warns: "Disaster could strike at any moment. While I can still go out, I need to think carefully about where to go first."
The Rescue Beacon Endgame
Your ultimate goal is surviving ten days until evacuation. On day ten, you must craft a rescue beacon at your workbench using broken glass and scrap metal. This triggers the game's climax: you signal for help, rescue your neighbor, and complete the demo's main story arc.
The full game promises "more playable characters with their own story lines, new locations across pre and post-disaster phases and more systems." The three confirmed starting characters are:
| Character | Unique Skill | Playstyle |
|---|---|---|
| Wage Slave | Junk-to-useful crafting | Balanced, accessible |
| College Student | Food growing and boosting meals | Farming-focused |
| Warehouse Manager | Supply organization and resource discovery | Logistics expert |
Common Beginner Mistakes to Avoid
The community wiki lists five frequent failures that end runs prematurely. Learn from these player experiences:
- Buying furniture before water – Aesthetics won't keep you hydrated.
- Ignoring basement fuel logistics – The generator is useless without diesel.
- Exploring at night with low stamina – This is how you get bitten.
- Rescuing neighbors into an unprepared safehouse – Extra mouths need extra food.
- Ending days with leftover Planning Points – Unused points are wasted opportunities.
The game's roguelite structure means every failure teaches you something. The official description frames it perfectly: "Every failure becomes experience. Reborn with your memories, uncover the disaster's truth." Your first run is a learning experience; your tenth is a masterclass.
FAQ
How long does the Survival Log one day to prepare phase last?
The pre-disaster phase lasts roughly ten in-game hours, though this can vary based on your actions. Every trip to a location consumes countdown time, so efficient route planning is essential to maximize your stockpile before the outbreak begins.
What should I buy first with my starting money?
Prioritize long-shelf-life food (rice, canned goods), bottled water, and a door repair kit. A storage rack and workbench materials come second. Avoid expensive furniture and generators until you've secured basic survival needs.
Can I play as different characters in Survival Log?
The demo restricts you to the Wage Slave character, but the full release offers three playable roles: the Wage Slave, a College Student with farming skills, and a Warehouse Manager with logistics expertise. Each has unique abilities that change your strategy.
Is the demo representative of the full game?
Yes, the demo teaches the core hoarding and safehouse mechanics you'll use in the full release. However, the complete game adds more locations, characters, and systems. The official Steam page notes that "what you've experienced is just one chapter" of the full experience.
Related Guides
How to Earn Survival Log Survival Points Fast: Complete Guide
Learn how to earn Survival Log survival points quickly with this guide covering wishes, morale, events, and progression strategies.
Survival Log 20 Day Achievement: How to Survive the Full Demo Run
Learn how to unlock the Survival Log 20 day achievement with this complete guide covering prep, resource management, and survival strategies.
Survival Log Apocalypse First Day Guide: 10-Hour Prep Checklist for Success
Master the Survival Log apocalypse first day with our expert prep guide. Learn the best hoarding, fortification, and survival strategies.
Survival Log Disasters Guide: How to Survive Every Catastrophe
Master Survival Log disasters with our expert guide. Learn to prep for zombie hordes, blackouts, and cold waves to keep your base secure.