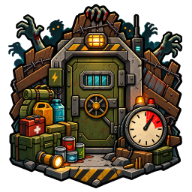
Survival Log Demo Part 3: Surviving the Zombie Siege and Day 10 Rescue
Our Survival Log demo part 3 recap covers the siege, base defense, second floor, and the race to build a rescue beacon by day 10.
The Siege Begins: Surviving the Horde in Survival Log Demo Part 3
The quiet, eerie tension of the early days in Survival Log shatters completely in the demo's third act. In this Survival Log demo part 3, players aren't just managing hunger and stamina; they're fighting for their lives against a relentless zombie siege. The game, developed by Midnight Workshop and published by Lilith Games, transforms from a hoarding sim into a frantic defense game as waves of the undead surround your safe house. Based on player experience from the demo, this section is a brutal test of your preparation, forcing you to balance repairs, resource management, and the psychological toll of the apocalypse. It's a stark reminder that every can of food and piece of scrap metal you hoarded in the first two parts is now a lifeline.
The core loop shifts dramatically when the horde arrives. You are no longer just watching the clock tick down to the outbreak; you are actively trying to survive it. The game’s description on Steam highlights this fusion of pre- and post-apocalypse gameplay. In the demo's third part, the "post" phase is in full swing, and it’s unforgiving. The experience is less about scavenging and more about holding the line, making every decision about stamina and resource allocation feel weighty and consequential.
Holding the Line: Door Repair and Base Defense
The most immediate threat in Survival Log demo part 3 is the constant assault on your front door. The game introduces a new, stressful priority: the structural integrity of your home. Zombies will continuously gnaw and bang on the door, and if you ignore them, it's game over. This creates a constant tension between addressing your own needs—like eating, sleeping, and crafting—and the ever-present need to keep the door from splintering.
Here’s a breakdown of the core defense loop based on community reports and gameplay:
- Constant Vigilance: You must regularly check the door's condition. A "Fix Door" action is your primary tool for keeping the horde at bay.
- Resource Sink: Repairing the door consumes valuable resources, which could otherwise be used for crafting or cooking. This forces you to make tough choices.
- Reinforcement is Key: Later, you unlock the ability to reinforce the door, making it more durable. This is a critical investment for long-term survival.
- Stamina Management: Engaging in repairs and combat drains stamina, which is already in high demand for crafting and other actions. The game forces you to prioritize.
This new pressure cooker environment is a significant departure from the early game's preparation phase. It's no longer enough to have stockpiled goods; you must now actively defend them. The constant threat of the horde adds a layer of tension that makes the resource management feel much more urgent and meaningful.
Expanding Your Fortress: Unlocking the Second Floor
Amidst the chaos, a key progression step in Survival Log demo part 3 is unlocking the second floor of your safe house. This isn't just a luxury; it's a strategic necessity. The process involves repairing the stairs three times, a task that competes with door repairs for your precious time and resources. However, the payoff is significant, as it opens up new possibilities for base building and survival.
The second floor provides much-needed extra space. In a game where inventory management and base layout are crucial, this new area can be a game-changer. Player experience suggests that this space is ideal for expanding your operations, potentially for things like:
- Additional Storage: A place to keep excess supplies safe from the chaos downstairs.
- New Crafting Stations: The space to set up more complex equipment.
- A Strategic Vantage Point: The second floor is where you'll eventually need to place critical items to signal for rescue.
However, the demo also reveals a learning curve. One player noted confusion about placing a solar panel on the second floor, wondering if it was a mistake to have placed it downstairs in a previous loop. This highlights the roguelite elements of the game, where knowledge from a failed run is your greatest asset. The demo encourages experimentation, even when it means making suboptimal choices to learn the mechanics.
Power Management and the Grid Collapse
As the days drag on, another layer of complexity is added: power management. The power grid becomes increasingly unstable, and you'll need to rely on your own resources. A generator becomes essential, but it requires fuel, which is a finite and valuable commodity. You'll also have the option to use solar panels, but as the demo shows, placement and timing are critical.
The game forces you to think about electricity conservation. A main quest in the demo even tasks you with turning off unnecessary electronic devices. This small act of management is a microcosm of the larger survival challenge: every resource, including electricity, must be accounted for. The situation escalates when the power grid is permanently destroyed, making your generator and any alternative power sources your only option. This event forces you to re-evaluate your entire strategy and highlights the importance of forward-thinking preparation.
Here is a quick look at power options in the demo:
| Power Source | Pros | Cons | Best Use Case |
|---|---|---|---|
| Diesel Generator | Reliable, provides consistent power | Requires scarce diesel fuel, can be loud | Powering essential appliances like the fridge |
| Solar Panel | No fuel cost, clean energy | Placement is critical, may not work in all areas | Providing passive power during the day |
| Manual Generator | No fuel needed, always available | Requires stamina to operate, likely low output | Emergency power for critical, short-duration tasks |
The eventual collapse of the grid is a pivotal moment in Survival Log demo part 3. It forces you to adapt and confirms that your long-term survival depends on your ability to become self-sufficient.
Crafting for Survival: From Noisemakers to Rescue Beacons
Crafting becomes more complex and vital in the demo's third part. It's not just about making food; it's about creating tools for survival. The game introduces a variety of new recipes, each serving a specific purpose in your fight to stay alive and escape.
- The Noisemaker: This is a crucial item for exploration. Crafted from scrap metal and broken glass, it allows you to distract zombies, creating a window of opportunity to leave your safe house and scavenge for supplies.
- The Door Repair Kit: A more efficient way to fix your door, this kit is a must-have for when you're low on time or need to make quick repairs during a siege.
- The Rescue Beacon: This is the ultimate goal for the demo's main story. After discovering a flyer about helicopter evacuations, you learn that you need to place a visible marker in a high location. Crafting this beacon is a multi-step process that requires specific materials and is the key to triggering the demo's ending.
The crafting system is intuitive but deep, requiring you to manage your inventory and ensure you have the right materials on hand. The game does a good job of guiding you toward these critical items, but it also allows for player freedom in how you approach the challenges. The need to craft a beacon to signal for rescue adds a clear, compelling objective to the survival sandbox.
The Final Countdown: Reaching Day 10 and the Demo's End
The demo's narrative builds toward a climax around day 10. The discovery of the rescue flyer introduces a new objective and a sense of hope, but it also creates a race against time. You have to gather the materials for the beacon, craft it, and figure out how to place it effectively, all while managing the constant zombie threat and your dwindling supplies.
The ending of Survival Log demo part 3 is a powerful hook for the full game. After completing the main story arc, players are presented with a choice: to end the run or continue surviving in the aftermath. This reinforces the game's replayability and its roguelite structure. The demo makes it clear that this is just one of many possible fates, and the full release will offer more branching paths and outcomes. It's a smart design choice that leaves players wanting more, eager to explore the game's full potential.
Key Takeaways from the Survival Log Demo
After playing through the intense third part of the demo, a few key things stand out about the core Survival Log experience.
| Feature | Demo Impression | Full Game Potential |
|---|---|---|
| Base Defense | Tense, resource-intensive, and engaging | Could become repetitive if not varied with traps and different horde types |
| Resource Management | Deep and consequential; every decision matters | The roguelite element of carrying knowledge forward will add strategic depth |
| Crafting | Intuitive and necessary for progression | The full game's larger recipe list will offer more creative solutions |
| Story & Pacing | The demo's narrative is a strong hook, building to a satisfying climax | The promise of branching paths and multiple characters is very exciting |
| Overall | A challenging and addictive survival sim | Has the potential to be a standout title in the genre if the content holds up |
The demo's third part is a masterclass in building tension and rewarding player preparation. It successfully transitions the game from a planning sim to an action-survival experience, and it does so without losing the strategic depth that makes the genre so compelling. The constant pressure from the zombie horde, combined with the need to manage your base, power, and resources, creates a gameplay loop that is both stressful and incredibly satisfying.
Frequently Asked Questions About the Survival Log Demo
What is the main objective in Survival Log demo part 3?
The primary goal is to survive the escalating zombie siege on your home. This involves repairing your door, managing your resources, and eventually crafting a rescue beacon to signal a helicopter for evacuation. This objective culminates in a finale around day 10.
How do you unlock the second floor in the demo?
To unlock the second floor, you must repair the stairs three times. This is a significant project that competes with door repairs for your time and materials, but it provides essential extra space for your survival operations.
Is power management important in the demo?
Yes, power management becomes critical. The power grid becomes unstable and eventually fails permanently, forcing you to rely on your own generator and fuel supply. You'll need to conserve electricity and manage fuel resources carefully to keep essential appliances running.
What happens after the main story of the demo ends?
After the main story arc is completed, the game offers you a choice. You can either end the run or continue playing in an "aftermath" mode for up to 20 days. This choice highlights the game's replayability and the promise of more branching paths in the full release.
Related Guides
Is Survival Log on Switch? Release Details, Price, and Gameplay Breakdown
Wondering about a Survival Log Switch release? Get the latest details on platforms, price, gameplay, and post-launch updates for this zombie survival sim.
Survival Log Demo Download: How to Try the Zombie Hoarding Sim Before You Buy
Learn how to get the Survival Log demo download, what to expect from the 1-2 hour trial, and why this pre-apocalypse hoarding sim is worth your time.
Survival Log Demo Part 1: A Complete Prepper's Guide to the First Run
Our Survival Log demo part 1 guide covers the opening loop, pre-disaster shopping list, base building tips, and what to expect in the first 10 days.
Survival Log Demo Part 2: Surviving the First Week of the Zombie Apocalypse
Survival Log demo part 2 covers the first week of the apocalypse. Learn key tips for base defense, resource management, and character progression.